how to


How to Install an ESD Workstation

April 21, 2014

How to install an ESD Workstation:mt4500b-mat-kit
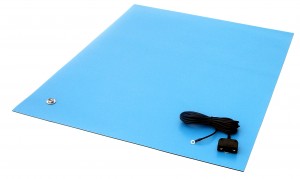
  1. Lay the table mat flat on the workbench with the snaps toward the operator. (Tip: Mild heat (sun light) will remove creases caused by shipping.)
  2. Connect the common point ground cord to the table mat by snapping it to the left or right snap.CP2500
  3. Connect the coil cord to the common point ground cord by plugging the banana plug into one of the ground cord’s banana jacks.
  4. Snap the wrist band to the coil cord. (Tip: make sure that the operator wears the wrist band on bare skin and tightens the band so that no gap exists between the skin and the band.
  5. Lay the floor mat on the floor in front of the workbench with the snaps toward the bench.
  6. Connect the floor mat ground cord to one snap on the floor mat.WB4037
  7. Connect the common point ground cord and floor mat ground cord to ground. Use the green wire building ground point as specified in EOS/ESD Standard 6. Connection to this ground point is most easily accomplished by removing the center AC outlet plate cover screw, placing the screw through the eyelets from both ground cords, and replacing the screw. The wires can be moved to the left and right sides of the screw so that they do not obstruct the outlet.
  8. comfort-dome-esd-mat-ground-cordHeel Grounders: Open the velcro strap. Place foot back into shoe and slip rubber cup onto the heel of the shoe. Insert tab into shoe and trim excess tab material with scissors if necessary.  Close velcro strap. Repeat procedure for other shoe.

Newly installed workstations should be tested for continuity. A surface resistivity meter with a “resistance to ground” function can be used to test continuity from the ground point to all parts of the workstation.


How to Design an Esd Workstation

September 28, 2011

An ESD Workstation is a work area with materials and equipment that limit electrostatic voltages and ESD (electrostatic discharge) or more commonly referred to as Static.

The first step in protecting a workstation is to ground all components of the work area (work surfaces, people, equipment, etc.) to the same electrical ground point called the “common point ground.”

While it is recommended to take every precaution available to control static, not all the ESD steps below may be necessary for basic ESD protection. Your workstation may not require all these items. Call Transforming Technologies for help designing your ESD workstation

ESD Protection Steps

1. ESD Table Mat

A work surface that removes static from conductive items placed on it. Commonly made from durable materials such as rubber, vinyl or laminate. A 10mm grounding snap should be installed in the mat or every 10 ft if it is long.

2. Wrist Band and Coil Cord Set

Safely grounds a person working at a workstation.  It is worn around the wrist and is connected to ground through a long coiled cord and the common point ground.

3. Common Point Ground

Used for grounding ESD mats and provide a path-to-ground for the person wearing wrist straps.  It attaches to the ESD worksurface via the 10mm grounding snap.


4. ESD Floor Mat

ESD floor mats remove static charges from conductive items placed on it. ESD footwear such as a Heel Grounder must be worn to remove static from the person standing on the mat. It is best used for mobile personnel that cannot be tethered to one location by a wrist strap.   A grounding snap should be installed in the mat or every 10 ft if it is long.

5. ESD Floor Mat Ground Cord

Used for grounding the floor mat by providing a path-to-ground for an ESD floor mat.  Connects to the mat via a grounding snap.

6. ESD Heel Grounders

Worn on each shoe to connect a walking or standing person to ground.

7. Constant Monitors

These electronic devices continuously monitor the path to ground of a wrist strap, work surface and other grounded components on a workstation.  Eliminates the need to test wrist bands and protects against ground failures.

8. ESD Jackets

Provide shielding from static charges on your clothing. A “Hip-to-Cuff” grounding system ensures proper grounding without requiring wristbands being worn that can inhibit your movement.

9. ESD Equipment Testers

ESD wrist strap and heel grounders, like any equipment used every day, can wear. Ensure these items are in proper working order with ESD Equipment testers.

10. ESD Air Ionizers

Materials, called insulators, cannot be grounded by typical means.  Ideally insulators should be removed from the workstation, but if they must stay an ESD Air ionizer can neutralize static buildup.  Delivering a balanced stream of ionized air, ionizers remove static charges from insulating materials and isolated conductors.

Every situation is unique and requires different steps to properly manage a static situation.

Stationary Personnel

Mandatory Steps: 1,2,3

Suggested Steps: 7,9

Optional Steps: 4,5,6,7,10

Mobile Personnel

Mandatory Steps: 4,5,6

Suggested Steps: 9


ESD Protection in the Field: Field Service Kits

April 7, 2011

ESD Protection in the Field
Static damage is a constant threat anywhere micro-electronic components are used, but these components are at highest risk during servicing. The Transforming Technologies’ FSM2424 Field Service Kit is designed to quickly and reliably remove static charge on the service technician and provide a safe static-free surface to lay parts. The kit includes a 24” x 24” rugged mat with two 8” x 12” pockets for storing tools, an adjustable wrist band, coil cord and 15’ ground cord.
The FSM2424 Field Service Kits eliminates static charge through the principle of grounding. Both the mat and the operator’s wrist band connect to the specialized ground cord which when properly connected to ground, provides a safe path for static charges to drain to ground.

Field Service Kit

Field Service Procedure
1. Upon arrival at the service call site, unpack the field service kit in a convenient area near the equipment to be serviced.
2. Remove any accessories from the pockets and attach the ground cord to the mat via one of the two snaps found in the corner of the mat.
3. Connect the opposite end of the cord to a reliable ground. Common ground locations are water pipes, unpainted equipment frames, and building frames.
4. Slip on the wrist band and adjust the size to fit comfortably around the wrist but tight enough to make contact with the skin at all times. Snap the coil cord to the wrist band.
5. Insert the banana plug of the coil cord into the jack of the ground cord. This connects the wrist band to the same common ground as the work surface.
6. It is now safe to remove and handle static-sensitive components.

Field Service Care
The FSM2424 Field Service Kits can be cleaned with ESD-safe mat and surface cleaner or with a mild detergent and water as needed. Once clean, allow the material to air dry, removing any excess water/moisture with an absorbent cloth. DO NOT use heat of any kind to dry mat. Though inherently flame resistant, the field service products will burn with enough exposure to open flame or other heat sources of sufficient temperature. DO NOT use a clothes dryer, as the excess heat may cause the PVC material to retain the shape it held in the dryer. Most strong solvents are not recommended. AVOID: Halogens, concentrated Oxidizing Agents, Ethers, ketones, and Low-Molecular Weight Solvents derived from the Ether and ketones fami-lies. They include (but are not limited to) TetraHydroFuran (THF), Methyl Ethyl ketone (MEK), Methyl Isobutyl Ketone (MIBK) and Acetone. These chemicals will mar and/or destroy the sur-face of the PVC product (the Ketones), react with it (Oxidizing Agents), or actually dissolve it (THF and other Ethers). Wrist strap can be hand or machined washed.

For information on resistance monitoring, dual conductor grounding products or any general questions, please contact Transforming Technologies at 419-841-9552 or email at info@transforming-technologies.com.

Translate »